How to Finally Master the Art of an At-Home Gel Manicure
Thespotlyte | July 27, 23
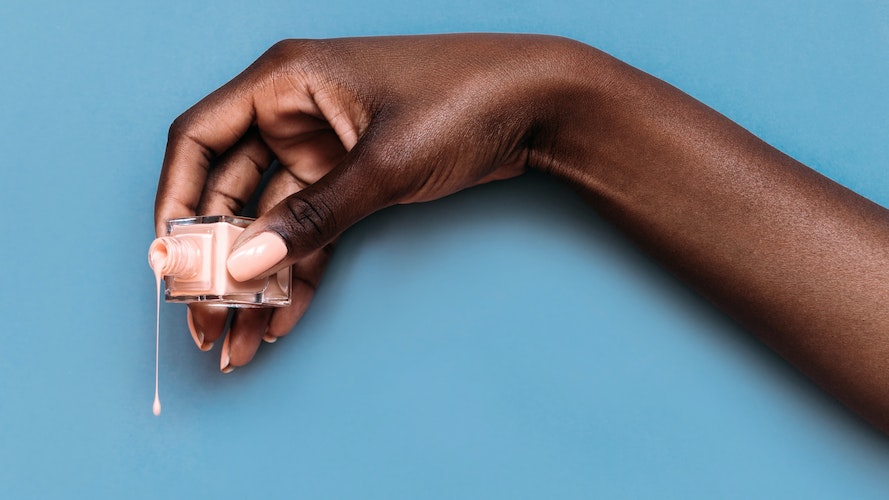
I’m hopelessly devoted to gel manicures, and have tried numerous DIY kits at home. Alas, I still find myself returning to the salon: my attempts never yield results quite as glossy, and they certainly don’t last as long as a professional gel manicure. (Think two days versus two weeks.)
Of course, the primary reason professional gel manicures look more polished — pardon the pun — is because they’re performed by, well, professionals. Nevertheless, DIY laqueristas on Reddit®, as well as friends with gleaming talons who swear they do their own gels, lead me to believe that I can, in fact, buff up on my own gel manicure skills.
Naturally, learning how to do your own gel manicure requires patience. It also requires tools beyond a basic emery board, and techniques that aren’t exactly intuitive — even if you’re a wizard with regular, non-gel polish. (Incidentally, I wouldn’t recommend attempting DIY gel unless you’re decently skilled with traditional polish first.) Below, professional manicurists share their tricks of the trade — including the oft-overlooked tools and techniques that can make the difference between an amateur gel manicure and one that looks (almost!) professional.
Gel Manicure Commandment #1: Invest in proper nail prep tools
There’s a reason the pros spend half of your manicure buffing, shaping, filing, and otherwise prepping the nail for the main event. The steps you take before you start polishing can make the difference between a hack job and a professional-looking gel manicure. (As my dad would say, “proper prior prepping prevents poor performance.”) Make sure you have these five pro tools on hand at all times:
- The pro tool: A crystal nail file
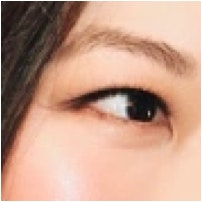
How it elevates your gel mani: When used improperly, traditional emery boards can shred your nails’ delicate keratin layers, notes celebrity nail pro Tracylee Percival. “This can cause thinning and peeling,” she warns. Crystal nail files are much more DIY-friendly — thanks to their ultra-smooth surfaces and lack of snagging potential: “You can file in any direction without risking nail damage,” Percival explains. She also adds that crystal files can seal the layers of keratin at the nail’s free edge (the top), which can actually strengthen the nail. For these reasons, Percival calls a crystal nail file the most important prep tool for any home mani — gel or otherwise.
Try: The KBShimmer® Crystal Nail File ($7), which is made from durable tempered glass, and can be washed and reused multiple times.
- The pro tool: A buffing block
How it elevates your gel mani: Gel extension specialist and consulting nail artist for ORLY®, Brittney Boyce, says this is one of the most important — and overlooked — tools for a professional-looking gel manicure. Buffing the nail resurfaces it, and thus ensures a clean slate for your gel polish to adhere to. “Make sure that you are buffing off all of the shine on your natural nail,” Boyce says, “leaving a matte finish.” (That said, do not overbuff, as this can thin the nails over time!) “Your nails should still be smooth after prepping,” Boyce adds. Her buffer of choice: one with 180 grit. “This helps me get the texture that I want without having to over-buff,” she says.
Try: The Gelish® 180 Grit File ($7), which meets Boyce’s pro specifications, can be used on fingers and toes.
- The pro tool: Nail dehydrator(s)
How it elevates your gel mani: Residue of any type, including lotions and natural oils from your skin, can inhibit gel polish from fully adhering to your nails. This can lead to premature peeling (and might explain why my DIY gels have historically only lasted a day or two). To ensure nails are devoid of product or oil, the pros advise “cleansing” each nail with either rubbing alcohol or acetone before you apply your basecoat. These products strip the nail of any barriers (oil, etc.) and improve polish adherence. As an additional measure, Percival suggests following with a pH-balancing nail product, which can “bring the [nail’s] pH balance back to its original state and allow for polish longevity.”
Try: The KBShimmer Nail Prep pH Balancing Pre-Polish Nail Treatment ($6) works to balance pH in a few simple swipes.
- The pro tool: A designated base coat
How it elevates your gel mani: Whenever I paint my nails with regular polish, I either skip the base coat entirely, or fish out whichever clear polish I can dig out of my supply kit most easily. (To be fair, many regular polish brands do offer convenient two-in-one options!) When it comes to gels, the notion of a two-in-one base/topcoat product doesn’t really exist, and using anything other than a bonafide base coat and/or a true topcoat is a major no-no. This is because gel base coats are designed to help polish grip the nail, whereas topcoats act more as a sealant for all of your hard work. For best results, choose a base and top coat combination that’s within the same brand as your color polish. This way, you’ll know that the formulas have been specifically designed to work together (and thus, give your manicure an even longer lifespan!).
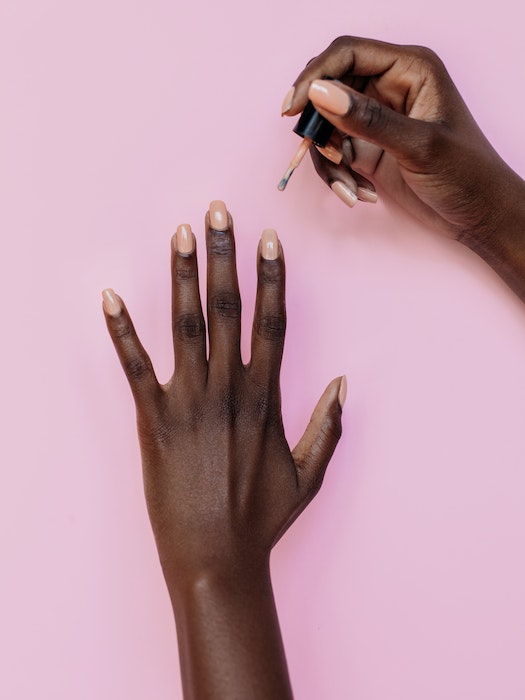
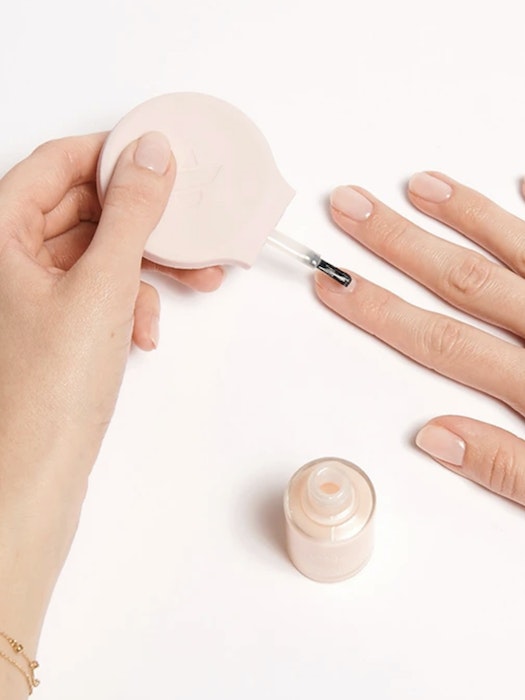
- The pro tool: A detail brush
How it elevates your gel mani: A messy paint job (wobbly edges, polish crossing onto your cuticles) is hardly a good look for any mani, gel or not. But for gel formulas in particular, it’s absolutely imperative that the polish stays only on the nail, never touching the skin (more on why later). Nevertheless, even the steadiest of hands slip up sometimes! (Psst: if you’re still mastering the whole ambidextrous thing, consider The PoppyTM from Olive & June®, a free-with-purchase, comfy universal nail polish bottle topper that eases awkwardness.)
If you do color outside the lines, Percival advises removing excess polish (i.e. polish that’s touching the skin or cuticle in any way) immediately, before it has a chance to dry. Try using a cotton swab or an orangewood stick like they do at the salon for mess-free cleanup. Once your skin is polish-free, Percival suggests dipping a detail brush into your polish and painting just up to the nail edges. Doing so gives you more control, and allows you to create a crisp line without risking polish spillover onto the skin. Voila! A clean, professional-looking finish!
Try: The Twinkled T® KolinskyTM Professional Nail Cleaning Brush, Size 2 ($12) outlasts many others in the category, thanks to its densely-packed, fray-free bristles.
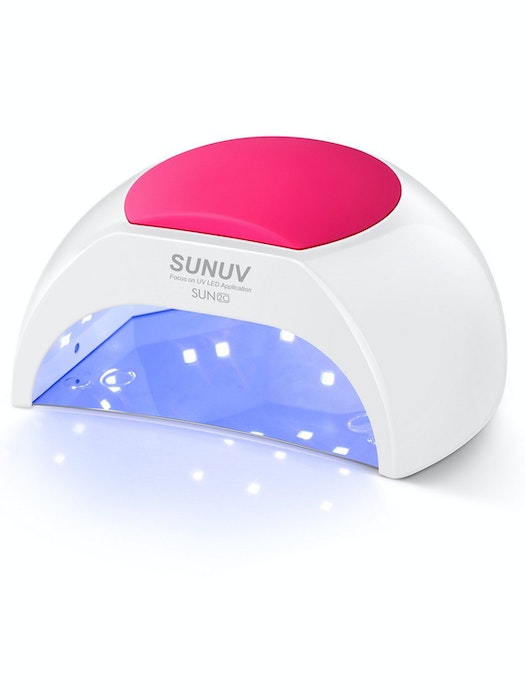
Gel Manicure Commandment #2: Match your polish with your lamp type
Regular polish will not cure under a gel lamp, and gel polish won’t dry without one. You probably know this already — but there are some not-so-blatant nuances to consider when choosing which gel lamp/polish combination to use. Most importantly, there are two basic types of gel lamps: UV lamps and LED lamps. Without getting overly scientific, here’s a quick breakdown of each:
- UV Lamps rely on UV light, usually UVA, to harden, or “cure,” gel polish. The hardening process can take a matter of minutes to work. One drawback is the UV light itself, as UV light is known to damage skin. The American Academy of Dermatology® recommends applying broad spectrum sunscreen anytime you use a UV nail lamp. (Just be sure the SPF isn’t on your nails themselves!) Alternatively, try fingerless UV-blocking gloves like ManiGlovz® ($24). The main benefit of UV lamps? They work on all types of gel polish.
- LED lamps are a newer technology, and rely primarily on light-emitting diodes to cure gel polish. It’s worth noting, however, that they do still emit UV rays, albeit less intensely than UV lamps. LED lamps can cure gel polish within a matter of seconds, making them speedier than their UV predecessors.
One drawback: LED lamps do not cure all types of gel polish. Thus, if you’re using an LED lamp, you must ensure that you’re selecting a compatible gel polish formula. Most gel polishes are formulated to work with LED these days, but be sure to check each gel manufacturer’s specific instructions before purchasing.
Try: The SunUV® 48W UV/LED Dryer ($49) is a professional-grade lamp that has over one thousand positive reviews on Amazon®; plus, it uses both UV and LED lights, meaning that it’s one of the rare devices that has the benefits of both.
Gel Manicure Commandment #3: Paint within the lines
As previously mentioned, it’s important to ensure you do not have any excess polish on your skin or cuticles before you begin curing your nails. “Properly cleanup any mistakes before putting your hand under the lamp,” says Boyce. This is because polish anywhere other than the nail — even a little bit! — is a fast track to peeling. Gel polish, even when cured, does not adhere to skin for long; gel that’s cured on the skin surrounding your nail will start to peel after one or two days, Percival says. When the gel does start to lift from your skin, it can take the gel polish from your nail with it, too.
Gel Manicure Commandment #4: Go easy on polish thickness
I’ve gotten away with thick-ish coats of regular, non-gel polish in the past. But when it comes to gel manicures, globbing on polish leads to peeling and slow, uneven curing. So, both Percival and Boyce stress the importance of practicing restraint with the amount of product you apply. “Use thin applications with every product,” Percival urges, “from base, to color, to top coat.”
As a general rule of thumb, the vast majority of products you use in your gel mani only require a single coat. The only exception is your color coat, which often requires two (thin!) coats to achieve an even, opaque finish.
Gel Manicure Commandment #5: Remove like a pro
Once your gel manicure has grown out — hopefully after a few weeks, if you followed the above tips! — it’s vital that you remove gel polish properly. Admittedly, this is one of the most annoying parts of the whole gel process — but doing it correctly can save your nails from damage, and ensure that they’re healthy enough for gels in the future. (Thin, brittle nails do not hold onto gel as readily as healthy nails do.) Never, ever peel your gel polish — as tempting as it may be. Instead, soak some cotton balls in pure acetone, place one on each finger, and wrap either tin foil or some handy nail clips over the top. Then, throw on your favorite show and wait. Happy polishing!
Learn more about nails: